 FlaskConnect™
User manual
A walk through your first FlaskConnect drawing — an apparatus diagram plus a structure — step by step, with real screenshots. Follow along as you read and you will know your way around in about ten minutes.
1. Getting to know the window
The window has three main areas: the palette on the left (everything you can place), the canvas in the middle (where you draw), and the properties on the right (settings for whatever you have selected). The toolbar across the top holds save, undo, align, export and more.
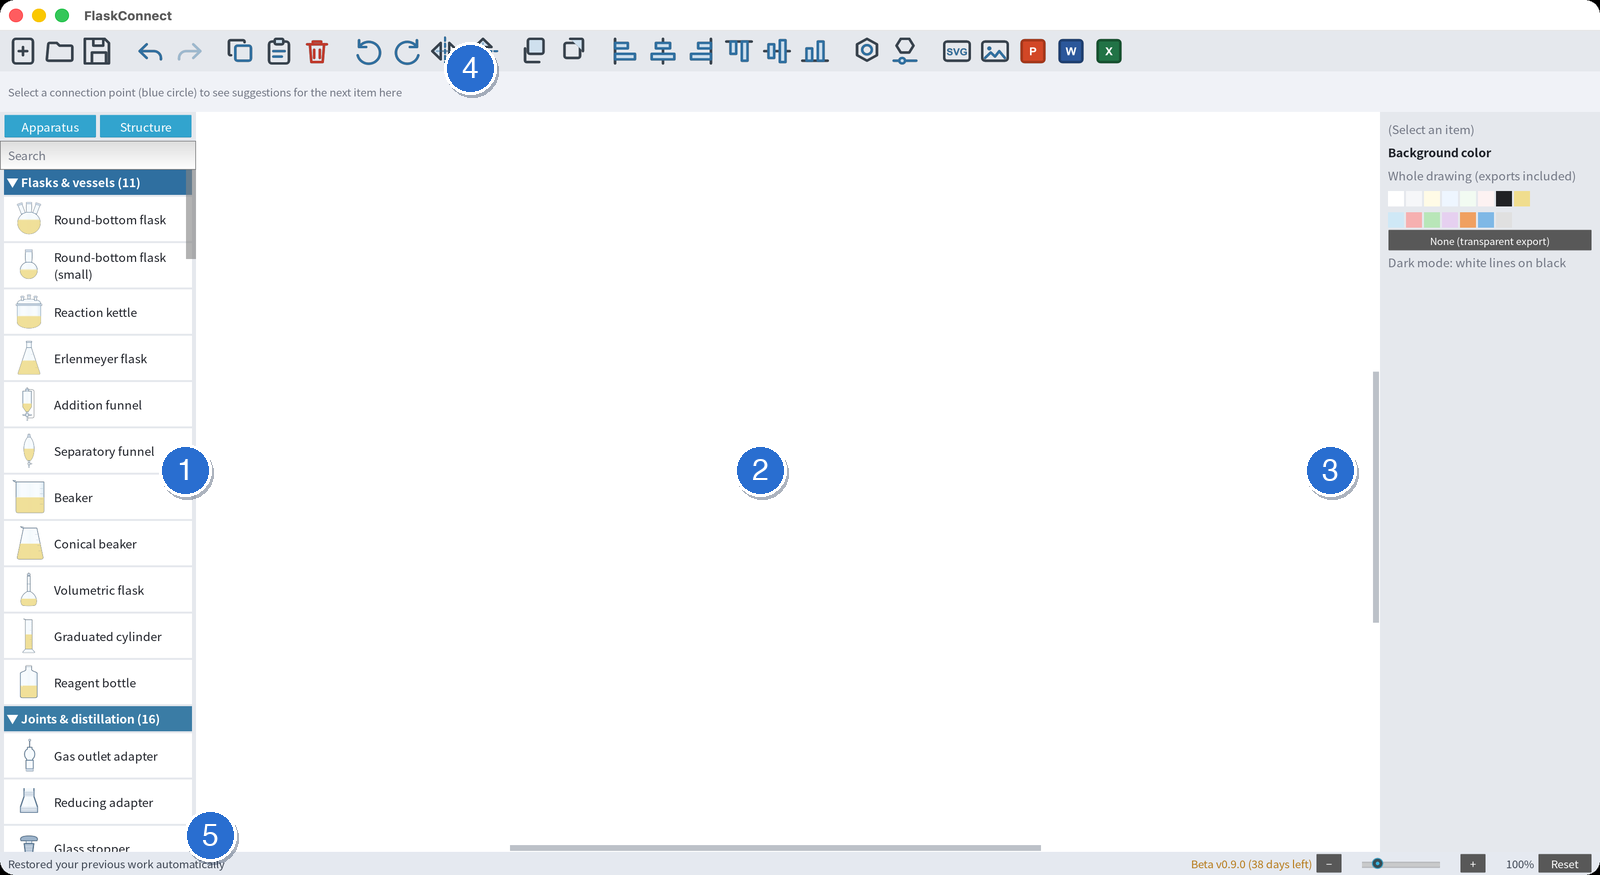
Whenever you are unsure what to do next, look at the status bar along the bottom of the window. It always shows a hint for the step you are in.
2. Drawing an apparatus diagram (place, connect, adjust)
2-1. Place an item
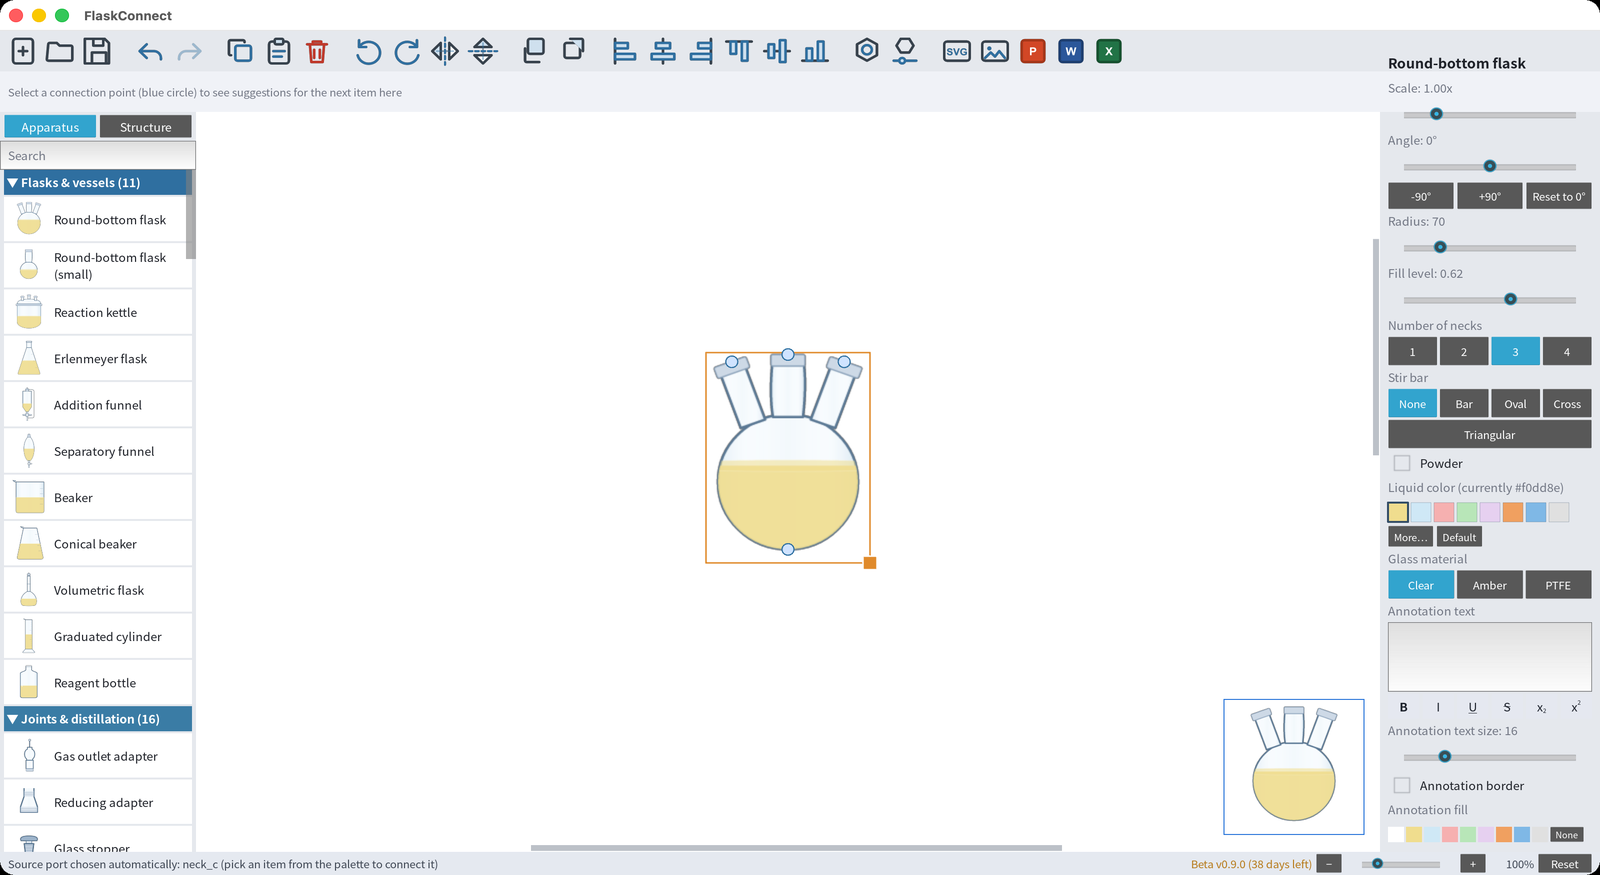
A single click on an item in the palette on the left puts it on the canvas, and you can drag it anywhere from there. The search box at the top of the palette narrows the list by name.
2-2. Connect items
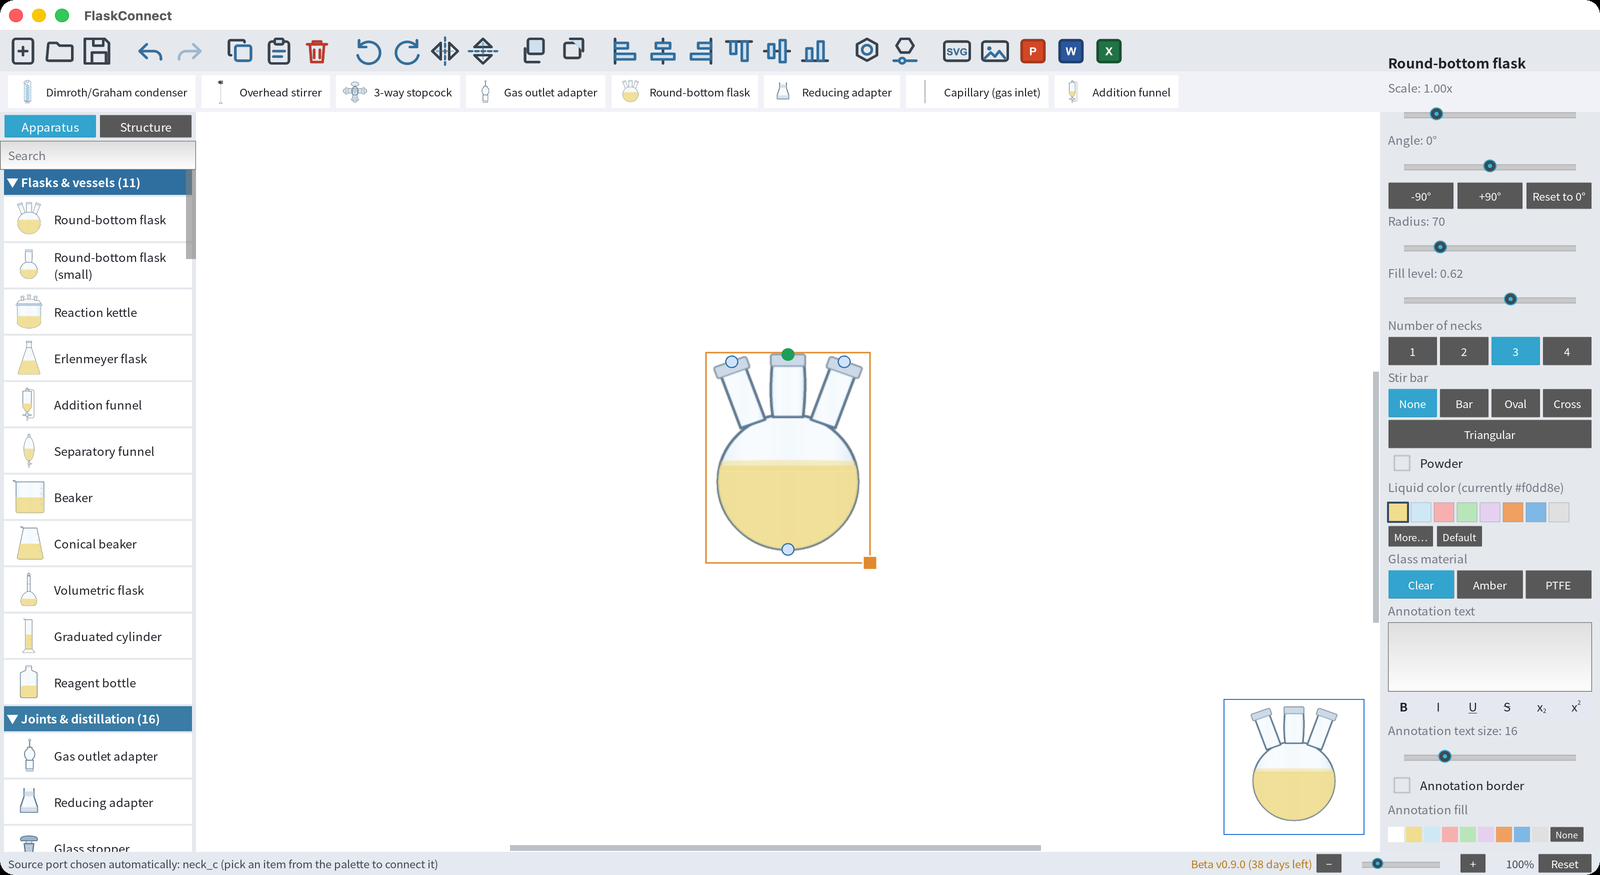
Click a blue ○ (connection point) on an item and the items that can be attached there appear along the top of the window. Click one of them and it is connected in exactly the right place — no lining up tubing by hand.
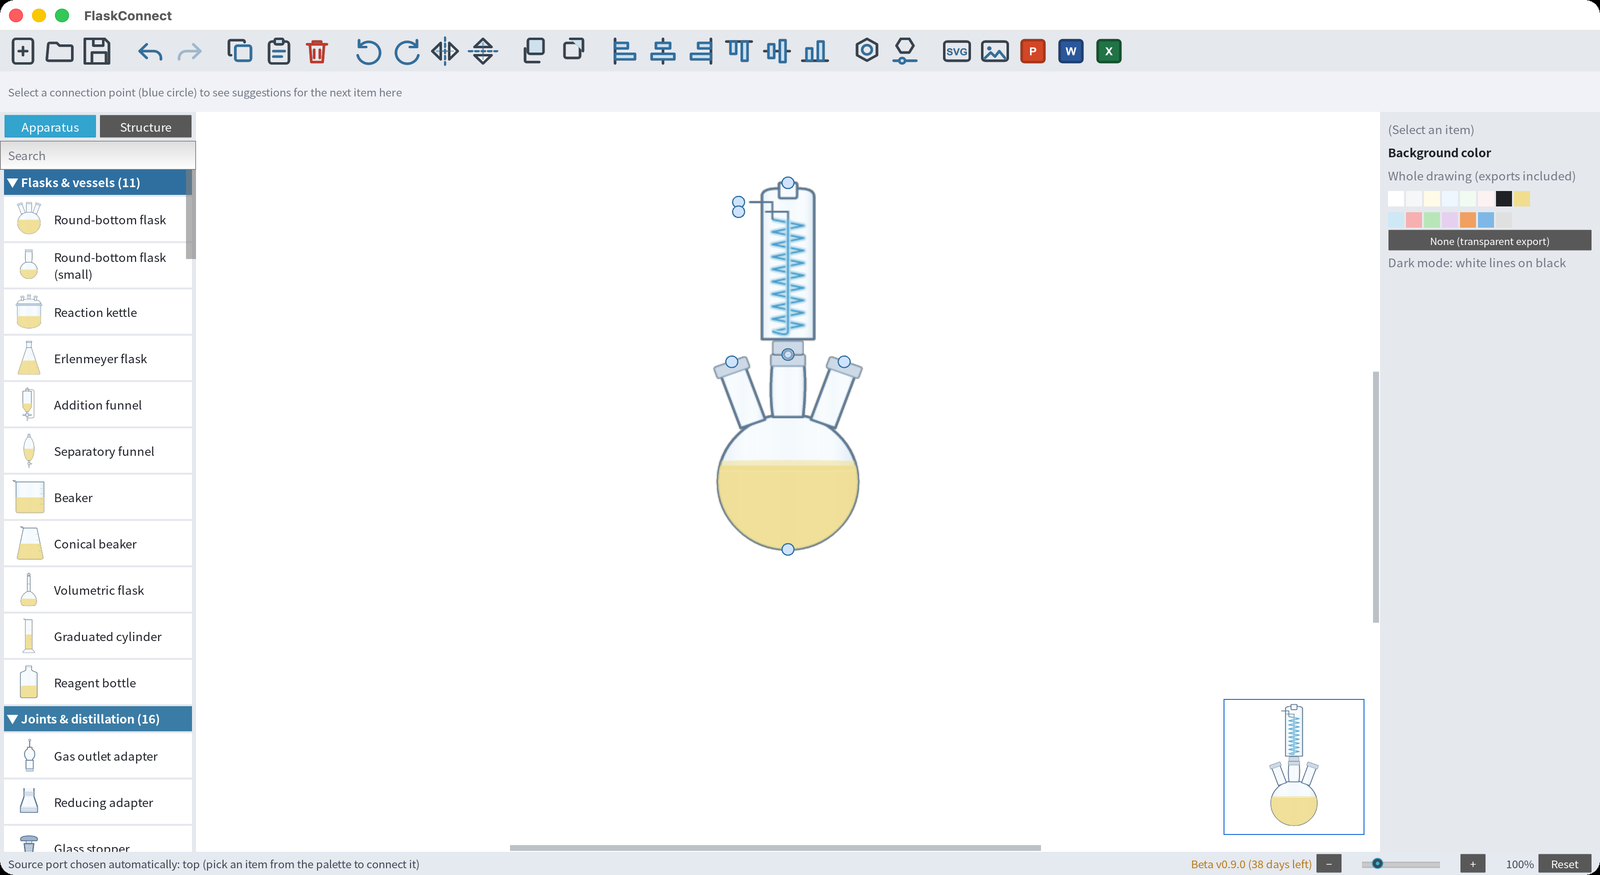
Items that slot into a neck, such as septa and thermometers, work by dragging: bring one near the neck, a green preview appears, and letting go joins them directly. To send a moved item back to its default position, select the connection and double-click its dotted line.
2-3. Adjust the shape, fill level and color
Click an item to select it and the properties on the right show its size, fill level, liquid color, number of necks and so on. Change a value and the canvas updates as you type.
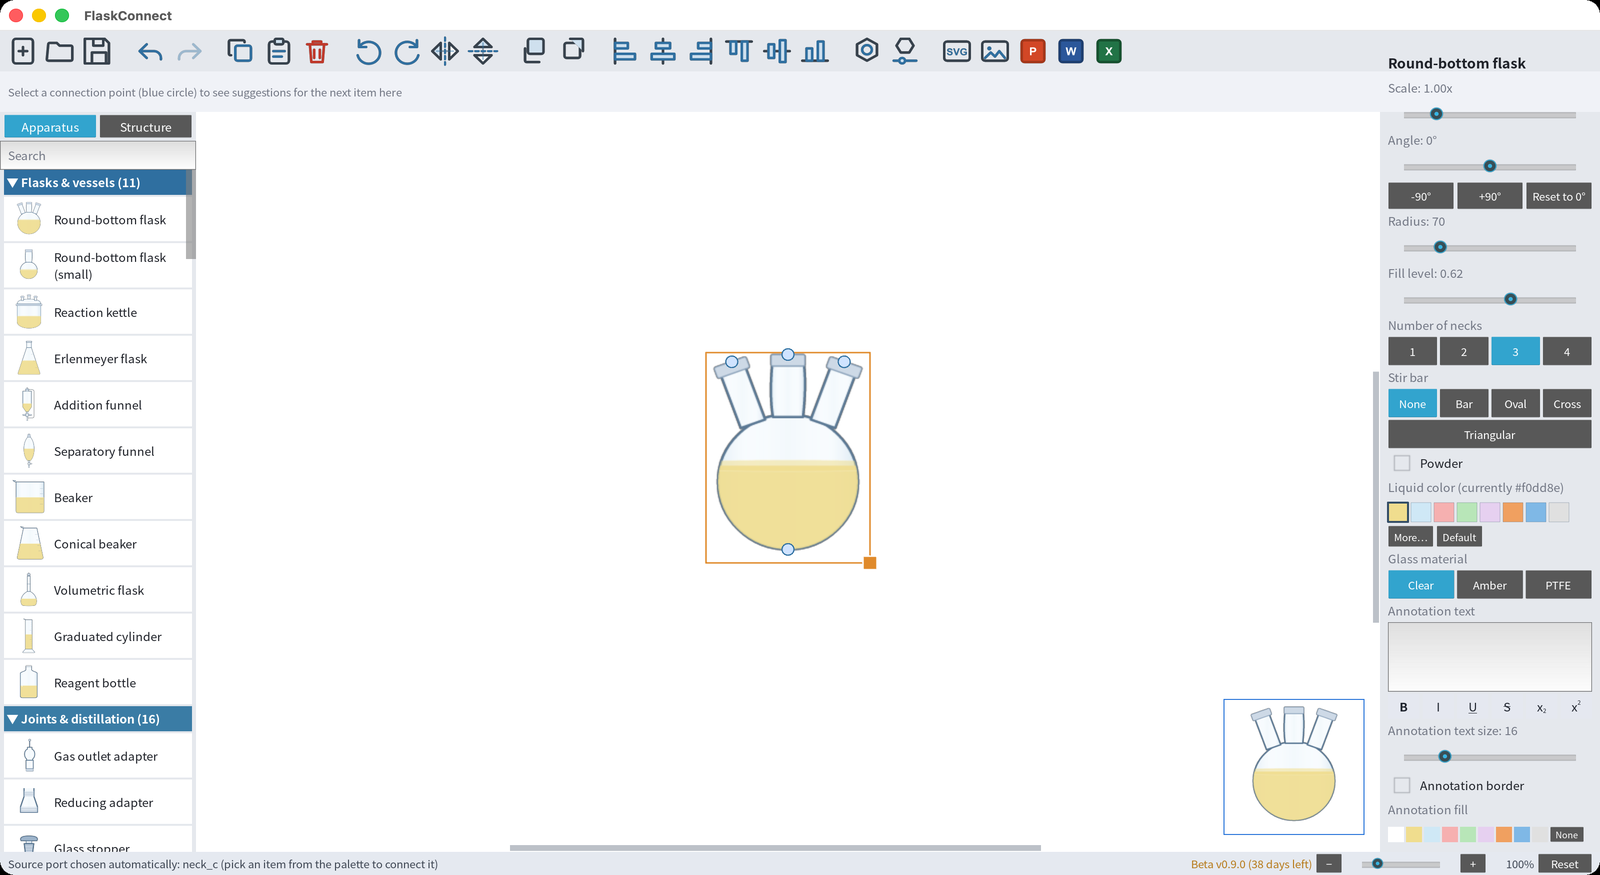
For position and orientation the keyboard is quicker: arrow keys move the item (hold Shift to move further), [ / ] rotate it, and H / V flip it.
3. Drawing structures
Switch to the Structure tab at the top left and you can draw chemical structures on the same canvas. In Draw mode, clicking or dragging extends bonds, so you can sketch a carbon skeleton directly. Picking an element (C, N, O..., or any element from the periodic table) or a group (such as Me) keeps the same gestures — you stay in the flow of drawing: dragging from an atom extends a bond with that element, clicking an atom rewrites it, and clicking empty space starts a new fragment.
For known compounds, calling one up is faster than drawing it: press “+ Name / CAS / SMILES…” and type a compound name, a CAS number or a SMILES string.
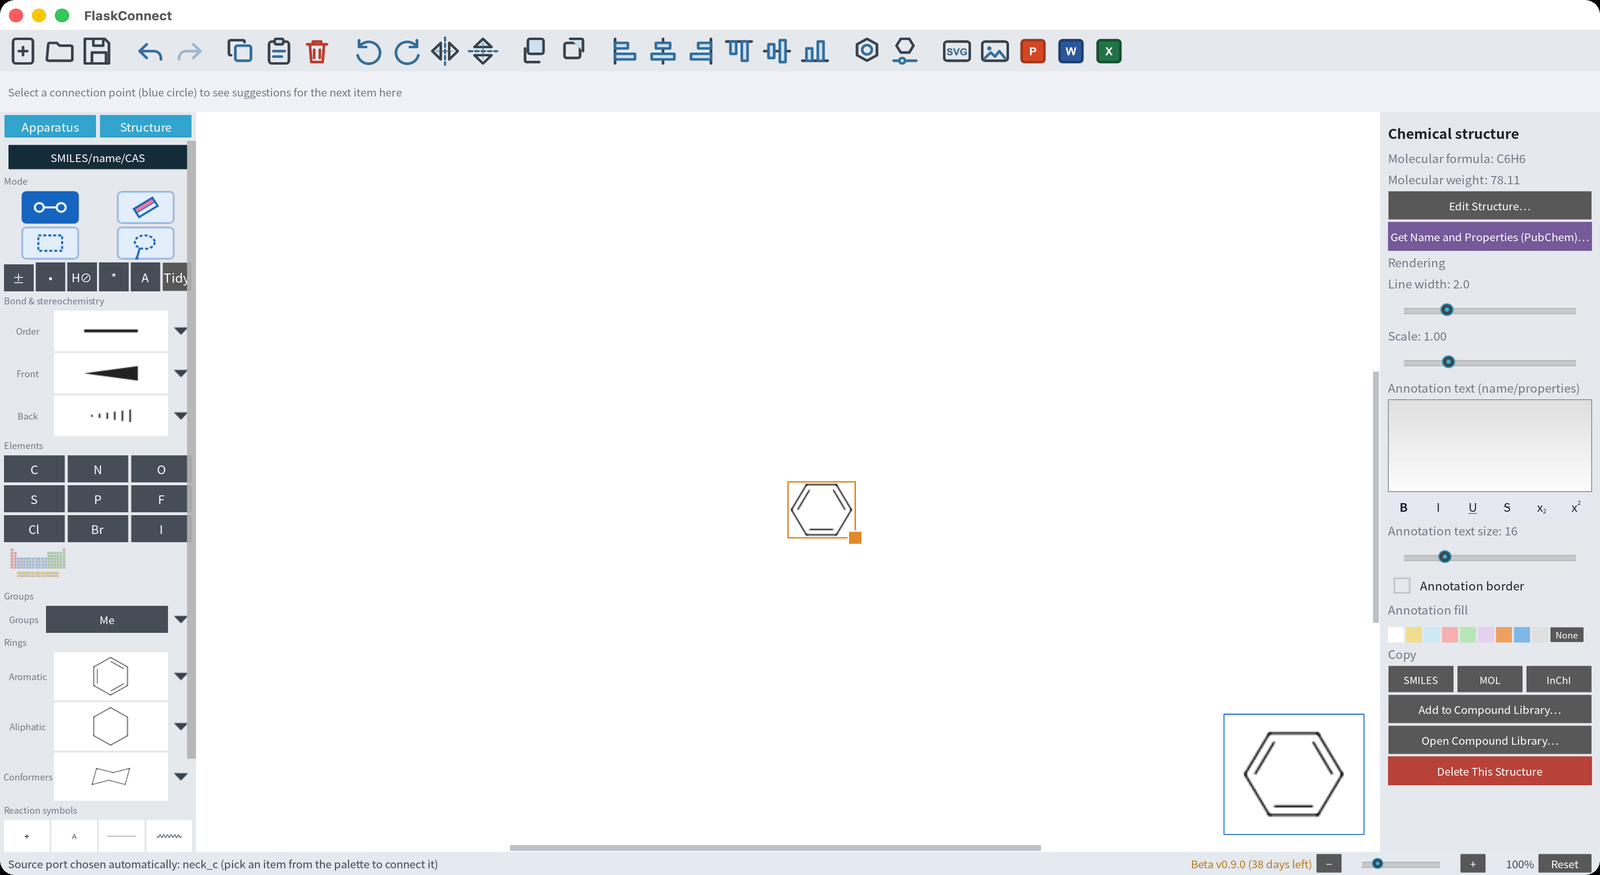
benzene. A CAS number (71-43-2) or a SMILES string (c1ccccc1) brings up the same structure. Styling follows the ACS standard.- Editing rings, bonds and atoms: the ring templates and bond tools in the sidebar edit a structure in place. Clicking a bond cycles it from single to double to triple.
- PubChem lookup: select a compound to fetch its name and physical properties (an internet connection is required).
- Alongside the apparatus: structures and reaction schemes live in the same drawing as your apparatus diagram. The tabs simply choose which of the two you are editing.
4. Adding text and arrows
The text button (A) in the toolbar adds labels and annotations, and the arrow tool adds reaction arrows and leader lines. Text supports bold, italic and superscript/subscript (H2O and the like), and a double-click edits it in place. Text drawn inside equipment — a thermometer reading, an instrument name, a unit — can also be edited directly by double-clicking that text, right where it is drawn and at its drawn size.
P&ID symbols (simplified diagrams)
The P&ID button in the toolbar switches the whole figure between pictorial apparatus and P&ID symbols (vessels, instrument balloons, valves). The dialog also controls labels and the legend. To switch a single instrument, select it and use the Notation property. "Auto-number tags" assigns V-1, TI-1, etc. in one click, and the legend is exported exactly where you see it on screen.
5. Saving and exporting
Saving (.chemc)
Press Cmd+S (Ctrl+S on Windows) to save. Once the save finishes the status bar shows the file name and where it went. Work in progress is saved automatically for recovery, so you can pick up where you left off the next time you open the app. You can check the actual location from Help → Open the Save Folder in the menu.
- Windows: documents go to the Documents > FlaskConnect folder on your PC. Because iCloud sync is a feature between Apple devices, there is no automatic sync with Mac or iPad. To move a drawing across, copy the .chemc file by hand; the format is the same, so it opens as-is.
- Mac / iPad: documents go to the iCloud Drive > FlaskConnect folder, and iCloud keeps your Mac and your iPad in sync.
Exporting
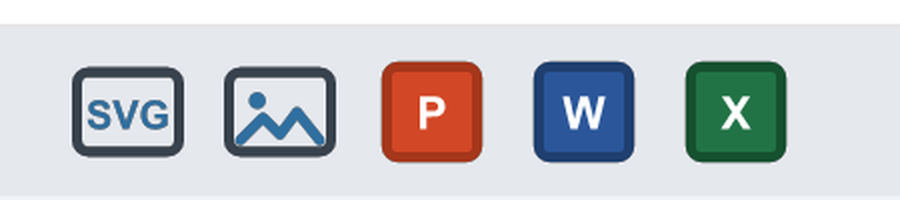
The buttons on the right of the toolbar export your drawing in the following formats. Every export is processed on your device.
| Format | Best for | Available on |
|---|---|---|
| SVG | Vector output. Lines stay sharp at any size, which makes it ideal for papers and theses | Windows / Mac / iPad |
| PNG | A quick image to paste anywhere (a transparent background is available) | Windows / Mac / iPad |
| PowerPoint (.pptx) | Presentations. The drawing arrives already placed on a slide | Windows / Mac |
| Word (.docx) | Reports and lab notebooks | Windows / Mac |
| Excel (.xlsx) | Experiment records and tables | Windows / Mac |
The iPad build does not include PowerPoint, Word or Excel export, so those formats are not listed under the Export button. On iPad, export SVG or PNG and paste that into your document.
6. Shortcut reference (Windows / Mac)
| Action | Windows | Mac |
|---|---|---|
| Save | Ctrl+S | Cmd+S |
| Undo / Redo | Ctrl+Z / Ctrl+Shift+Z | Cmd+Z / Cmd+Shift+Z |
| Copy / Paste | Ctrl+C / Ctrl+V | Cmd+C / Cmd+V |
| Delete | Delete | |
| Rotate | [ / ] | |
| Flip horizontally / vertically | H / V | |
| Nudge the position | Arrow keys (Shift to move further) | |
| Add to the selection | Shift+click | |
| Select several at once | Drag from an empty spot (rectangular selection) | |
| Return a directly connected item to its default position | Select the connection, then double-click its dotted line | |
| Edit text in the figure (readings, names, notes) | Double-click the text | |
Using it on iPad
| Action | Gesture |
|---|---|
| Scroll / zoom | Two-finger drag / pinch |
| Undo / Redo | Two-finger tap / three-finger tap |
| Select and move | One finger (dragging from an empty spot makes a rectangular selection) |
| Apple Pencil | Supported (works exactly like a finger) |
If you get stuck
Questions about how something works, and bug reports, are welcome on the support page. You can also write to us from Help → Send Feedback inside the app.